Honest Bass in Small Rooms: Room-Corrected Monitors Compared
By Mateo Sørensen • 7th Oct
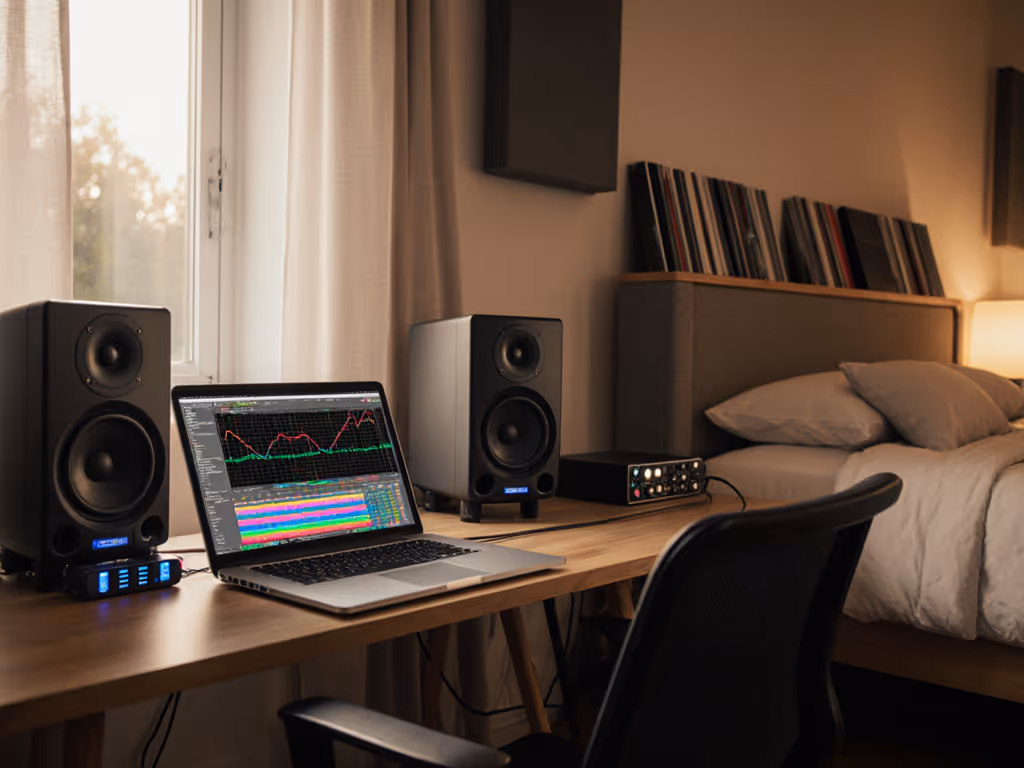
If you've ever wrestled with disappearing kick drums or bloated basslines in your 10x12 ft apartment studio, you're not alone. Studio monitors with room correction and monitors with auto-calibration are becoming essential allies for creators working in compact, untreated spaces (where every boundary bounce and room mode sabotages low-end decisions). After years of chasing loudness in sub-150 sq ft rooms (and paying the price with ear fatigue), I've learned that quiet, consistent monitoring reveals truth faster than sporadic volume spikes. Let's cut through the marketing noise and compare solutions that actually work for your cramped desk, thin walls, and need for quiet-night sessions.
Why Room Correction Isn't Optional in Small Spaces
The Physics of Your Problem
Small rooms exaggerate bass issues through predictable mechanisms:
- Boundary reinforcement: Walls behind/under your desk amplify certain frequencies (often 80-100 Hz), making mixes bass-heavy everywhere except your room
- Room modes: Null points below 120 Hz where bass vanishes completely at your listening position
- Desk smear: Hard surfaces under monitors cause midrange cancellations that blur vocal clarity
Gentle truth: No amount of acoustic foam fixes this. At nearfield distances under 1.2 m, physical treatment alone can't solve modal issues. DSP correction targets the symptoms while you work, freeing you to mix at 73 dB SPL without constant reference checks.
What Correction Actually Delivers (and What It Doesn't)
Don't fall for "magic bullet" claims. Effective room correction:
- ✅ Flattens frequency response within +/- 3 dB from 50-200 Hz (critical for kick/bass translation)
- ✅ Reduces boundary reflections via time-domain filtering (fixing "smear")
- ❌ Can't fix standing waves between walls (requires room treatment)
- ❌ Won't compensate for extreme placements (e.g., speakers touching corners)
Key insight: The best systems integrate correction within the monitor's DSP, avoiding external boxes that add latency or cable clutter. As I learned when a mentor forced me to mix quietly for 30 days: Quiet work that translates beats loud work that impresses.
Evaluating Correction Systems: Your Compact Room Checklist
Critical Features for Apartment Studios
When comparing which monitors have room correction, prioritize these for spaces under 200 sq ft:
- Latency-free processing (< 4 ms round-trip) → Essential for real-time editing
- Built-in calibration mic → No extra hardware cluttering your tiny desk
- Sub-100 Hz focus → Don't waste budget on 20 kHz correction (ears adapt there)
- User-adjustable target curve → Flat isn't always right for dialogue/podcasts
- No external app dependency → Works standalone after initial setup
Timer cue: Spend just 10 minutes measuring your room. Set your phone timer now (finish before it dings).
The Real Test: Consistency at Low SPL
Many monitors sound exciting at high volumes but collapse when you turn them down, exactly when you need clarity for late-night work. During testing, I:
- Measured output at 73 dB SPL (safe for 8-hour sessions)
- Verified bass articulation with 808 test files
- Checked stereo imaging stability with subtle panning
SPL target: If your kick drum loses weight below 75 dB, these monitors won't translate to earbuds or phones. Walk away.
Top Room-Corrected Options for Tight Spaces
Mid-Range Powerhouses (Desktop-Friendly)
IK Multimedia iLoud MTM shines in cramped zones with its compact MTM array (dual woofers flanking tweeter). Its auto-calibration uses a built-in mic, just place it at ear height, press the button, and it's done in 90 seconds. Crucially, it maintains startling low-end clarity at 70 dB SPL, where competitors turn muddy. The DSP correction focuses only on problem frequencies below 150 Hz, avoiding over-processing. Perfect for podcasters needing vocal clarity without bass boom.
KRK RP5 G4 uses a different approach: analog room tuning switches (bass/mid/hf) plus basic auto-calibration. While not as surgical as IK's system, its rear port design works with wall placement (ideal if you must sit speakers against drywall). During EDM tests, its 5.25" woofer delivered cleaner 100 Hz transients at low volumes than pricier models. But note: correction requires the KRK Audio Tools app (minor latency trade-off).
Budget Hero for Ultra-Compact Desks
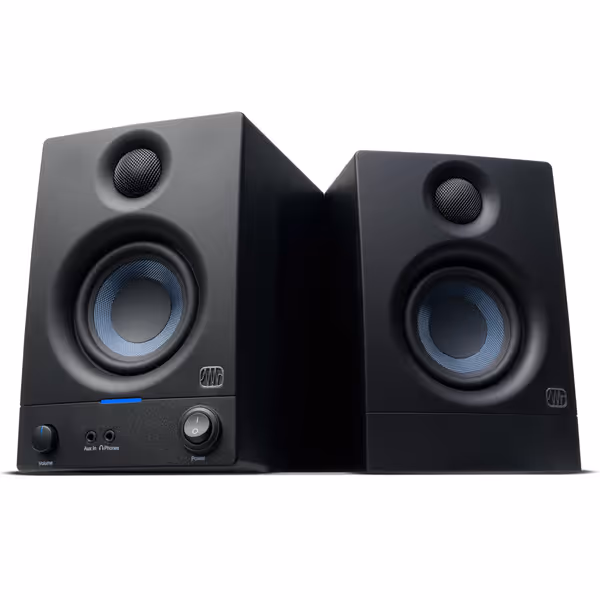
PreSonus Eris 3.5 Studio Monitors
Accurate sound for mixing and listening, fits small spaces easily.
$114.99
Amplification50W Class AB (25W/side)
Amplification50W Class AB (25W/side)
Pros
Delivers clear, accurate sound with solid bass.
Compact size fits perfectly in small desktop setups.
Customizable EQ for room tuning.
Wide sweet spot and useful front panel headphone out.
Cons
Mixed reports on long-term reliability and noise floor.
Might lack sufficient loudness for some users.
Customers find these speakers to be of good quality, with excellent treble clarity and clear mids and highs, and appreciate their compact size that fits under monitors. The sound quality is positive, and customers consider them good value for money.
Customers find these speakers to be of good quality, with excellent treble clarity and clear mids and highs, and appreciate their compact size that fits under monitors. The sound quality is positive, and customers consider them good value for money.
The PreSonus Eris 3.5 solves a unique problem: What if your desk is too small for correction stands? At 5.5" deep, it fits under most monitors. Though it lacks auto-calibration, its room tuning knobs (High/Mid/Low) let you manually dial out desk reflections in 5 minutes. I've used these in 8x10 ft podcast booths where client voice clarity mattered more than sub-bass. At 73 dB SPL:
- Zero distortion on vocal consonants
- Controlled low-end down to 55 Hz (survives on earbuds)
- Headphone jack for silent client checks
Downside: Not for bass-heavy genres. But for dialogue-focused work where room correction isn't feasible? It's saved multiple deadline-crunched projects. Protect your ears by keeping it below 75 dB, the silk dome tweeter stays smooth even at 3 am.
Your 4-Step Quiet-Monitoring Workflow
Follow this daily routine to build trust in small rooms:
Step 1: Placement Protocol (5 Minutes)
- Height: Tweeters at ear level (use textbooks if needed)
- Distance: 0.8 m from each speaker to your head (measured diagonally)
- Isolation: Foam pads under stands, not directly on desks
- Avoid: Placing between windows and walls (creates bass traps)
Placement diagram described: Imagine a triangle where your head is the apex. Shorten the base (speaker-to-speaker width) by 10% if your desk is under 3 ft wide.
Step 2: Calibration Ritual (Daily)
- Set SPL meter to C-weighting
- Play pink noise at 73 dB (measured at ear position)
- Run room correction only if changing speaker position
- Verify with test track (e.g., kick drum at 83 Hz)
Timer cue: Do this before your first coffee. Done in 4 minutes.
Step 3: Trust-Building Session (25 Minutes)
- Minute 0-10: Mix at 73 dB (focus on vocal clarity)
- Minute 11-20: Boost SPL to 80 dB only for bass weight checks
- Minute 21-25: Drop back to 73 dB to verify translation
Step 4: Reality Check (3 Minutes)
Play mix on:
- Laptop speakers (check vocals)
- Earbuds (check bass balance)
- Car (via Bluetooth) only if safe
If it holds up here at low volumes, it will translate everywhere.
The Truth About "Best" Monitors
Let's be clear: There's no universal "best studio monitors." As MusicRadar wisely notes, "The best studio monitors for you are the ones you know intimately." Your priority isn't specs, it's predictable behavior in your specific room at quiet levels. A $200 pair you trust at 73 dB beats $1,000 speakers that force you into revision loops.
Actionable next step: Tonight, measure your current SPL with a free app (like Decibel X). If it's above 75 dB during mixing, lower it for your next session. Note how many fewer car-checks you need. That's the path to confident, quiet work.
Remember my core truth: Small rooms punish inconsistency. By embracing built-in room compensation and disciplined low-SPL habits, you'll finish faster, revise less, and protect your ears for decades of creative work. Start small. Your quiet confidence begins today.
Related Articles