USB Studio Monitors as Your Audio Interface: DAW Setup Guide
By Jae Min Park • 6th Sep
What to do
Set up USB studio monitors in Ableton Live only after checking the model-specific documentation to determine whether the system is intended to work as an audio device, confirming that it is listed by your operating system and Live, and confirming that the required channels can be activated in Live.
- Start with: Check the model-specific manual, operating-system and Live device lists, available audio-interface drivers where applicable, and direct USB connection.
- Then: In Live’s Audio preferences, choose CoreAudio on Mac or ASIO on Windows. On macOS, select the required input and output devices; on Windows, select the appropriate available ASIO driver.
- Important prerequisite: Treat playback and recording as separate checks.
Important: The documented menu path is specific to Ableton Live, and device capabilities, drivers, channel counts, and supported settings must be verified for each monitor system.
A studio monitor audio interface setup can simplify a small desk, but first check the specific USB monitor system’s documentation to determine whether it is intended to work with your computer and DAW as an audio device. This USB monitor DAW setup guide keeps the job practical: confirm the documented capabilities, confirm that the system is listed by your operating system and Live, check the channels Live lets you activate, configure the system in Ableton Live, then test playback and recording separately. USB playback alone does not prove that a monitor system has recording inputs. For a deeper explanation of how USB monitors use built-in DACs and compare with traditional interface setups, see our USB studio monitors guide.
The goal is not a complicated signal path. It is one repeatable routine you can trust when you sit down to work.
Step 1: Establish what your USB monitor system can do
Before changing any DAW settings, find the model-specific manual or support page for your monitor system. You need answers to three simple questions:
- Does its documentation say it is intended to work as an audio device with your computer and DAW?
- What input and output capabilities does its documentation list, and which required channels can you activate in Live’s Input Config and Output Config?
- If the system functions as an audio interface, are current drivers available for your operating system?
This is the decision point many setups skip. If the documentation describes USB playback, check it separately for recording capability. In Live, use Input Config to confirm that each required input channel can be activated before treating the selected setup as a recording device. Do not assume microphone, instrument, or other recording inputs exist just because audio reaches the speakers over USB.
Treat output and input as two separate boxes to tick. Hearing your DAW is one box; recording into it is another.
For the cleanest starting point, connect the USB device directly to the computer when possible. If you genuinely have no spare port, a powered USB hub is the better fallback than building your initial test around an unpowered hub.
A two-minute capability check
- Connect the monitor system and power it on.
- Check the model-specific documentation, then confirm that the system is listed among the available audio devices in your operating system and in Live.
- Read the manual’s input/output section (not just the marketing overview).
- If the system functions as an audio interface and a current driver is available for your operating system, download and install it.
- Restart if the driver installer instructs you to do so.
Some macOS audio interfaces need no added software. On Windows, an unavailable, outdated, disabled, or incorrectly loaded driver can keep an output device from appearing. Microsoft advises that when a Windows audio driver is missing or incompatible, obtain the latest driver from the PC or sound-card manufacturer’s support site, install it, and restart the PC.
Step 2: Choose the right setup path
There are two common paths, and choosing one prevents a lot of unnecessary troubleshooting.
Path A: One selected audio device provides the needed channels
Use this path only if the selected audio device’s documentation confirms the needed input and output channels and Live’s Input Config and Output Config let you activate the required ones. You can then select that device for recording and playback inside Ableton Live.
Path B: On macOS, use separate input and output devices
Live on macOS can use separate input and output devices. If the specific USB monitor system’s documentation indicates that it can be used as an output device and it is listed by macOS and Live, select it for output and select another audio device that provides the required recording inputs for input. Otherwise, follow your monitor system’s own documented workflow.
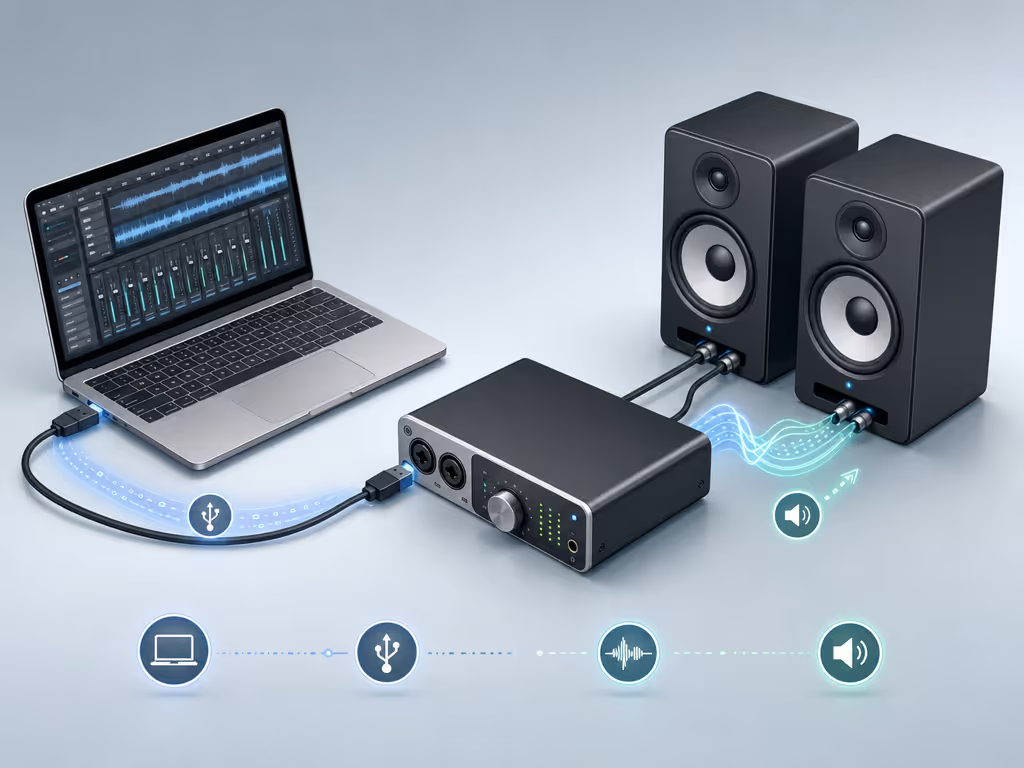
This distinction is useful because it keeps you from trying to solve an input problem with buffer changes, or a playback problem with an input setting. For this macOS configuration, the signal path should read clearly: Before troubleshooting that chain, review the differences between XLR, TRS, and RCA connections so the physical connection matches your device’s requirements.
source → selected input device → DAW track → selected output device → USB monitor system
If one link is absent, fix that link first. Start small, finish more.
Step 3: Configure the USB device in Ableton Live
The following is specifically an Ableton Live workflow. If you want to explore how monitor choices can affect DAW-specific workflows, see our DAW monitor workflow comparison.
Open the Audio preferences
- Open Preferences in Live.
- Select the Audio tab.
- Under Driver Type, choose:
- CoreAudio on Mac
- ASIO on Windows
On Windows, select the available ASIO driver for your USB audio device. If Live offers Hardware Setup, it may open the device’s own control panel, where buffer size is sometimes adjusted.
Select input and output devices deliberately
On macOS, Live can use separate input and output devices. Set the input device to the device you will record through, and the output device to your USB monitor system. If you are not recording, set the input to No Device rather than leaving unused inputs active.
On Windows, select the device/driver that actually provides the I/O arrangement you need. Before recording, verify the device’s documented inputs and activate the required channels in Input Config; selecting a playback device in Live does not create recording inputs.
Activate only the channels you need
Open Input Config and Output Config. Enable the channels required for today’s work, not every possible channel. Live advises activating only needed channels to save CPU.
For a basic stereo monitoring session, enable the stereo output that corresponds to the monitor system. For recording, enable only the input channels that your actual input device provides and that you plan to use.
Step 4: Set sample rate and buffer without chasing numbers
A stable setting is more useful than the smallest number on screen. Live’s documented default In/Out sample rate is 44,100 Hz. Start there unless you have a reason to change it, and keep the setup consistent rather than changing settings casually between sessions.
In Ableton Live, buffer size is part of the tradeoff between latency and CPU load:
- Lower buffer sizes reduce latency but increase CPU load.
- Higher buffer sizes give the computer more breathing room.
- Live’s buffer choices begin at 32 samples and move in powers of two.
- Ableton identifies 256 or 512 samples as a useful compromise between latency and CPU load.
As a general starting point, begin at 256 or 512 samples and see whether playback remains stable. For a performance where timing feels critical, lower the buffer only as far as your computer can run cleanly. If audio becomes unreliable, return to the last stable setting.
That is a better method than treating low latency as a trophy. Your session needs to stay intact long enough for you to make decisions.
Step 5: Test playback before attempting recording
Create a short test session in Live:
- Put a known audio file on an audio track.
- Route the track to the enabled stereo output.
- Begin with the monitor system’s volume low.
- Play the track and raise volume carefully.
- Confirm that left/right playback and level control behave as expected.
Once playback works, save the project and note the driver, sample rate, and buffer size. This becomes your reset point if a future update or cable change causes confusion.
As a teaching assistant, I saw students add gear while their basic checks kept failing. The turning point was usually not another feature, it was removing variables and settling the desk setup before judging the mix. The same principle applies here: change one item, then listen again.
Step 6: Test recording only after confirming recording inputs for the selected audio device
For recording with USB monitors, first verify the selected input device’s documented recording capability, then activate the required channels in Live’s Input Config.
Then:
- Create an audio track in Live.
- Choose the active input channel in the track’s input selector.
- Arm the track for recording.
- Send a brief signal from the connected source.
- Confirm that Live’s meter responds before recording a take.
- Record a short clip, play it back, and confirm it returns through the USB monitor output.
If the input meter does not move, stop there. Recheck the selected input device, enabled channels in Input Config, and the device manual. Do not assume the speakers’ USB connection supplies a missing recording input.
Step 7: Use an aggregate device on Mac only when combining devices
If you want one device for input and a different device for output on macOS, Live can select separate input and output devices directly. An aggregate device is for the more specific case where you intentionally need macOS to combine devices into one device.
When creating an aggregate device in Audio MIDI Setup:
- Every member device must use the same sample rate.
- Choose one device as the primary clock source.
- Enable drift correction for devices that are not synchronized in hardware.
This is not a default upgrade. It is a special-purpose tool. Build an aggregate device only when separate selection does not meet your routing need.
Quick troubleshooting checklist
If your USB monitor driver setup is not behaving, work from the simplest check upward: For a broader process covering hum, distortion, channel imbalance, and other common faults, use our studio monitor troubleshooting guide.
- Is the device powered and directly connected to the computer?
- Does the model-specific documentation say it is intended to work as an audio device, and is it listed by the operating system and Live?
- If the device functions as an audio interface, is a current driver installed where one is available?
- Did you restart after installation?
- In Live, is the correct Driver Type selected for your platform?
- Is the device selected as the output device?
- Are the needed output channels enabled in Output Config?
- If recording, is there a real input device selected and are its channels enabled?
- Did you change only one setting before retesting?
FAQ
Do I need an audio interface for studio monitors?
Not always in the same way. If you are choosing an interface and monitors together, our guide to studio monitor-interface bundles can help you compare compatible, streamlined setups. Powered monitors can be connected to the outputs of a separate audio interface, and some products combine monitor-control and USB-interface functions. But whether a particular USB monitor system already provides the input and output functions you need is model-specific. Check its documentation, then configure the devices Live actually lists.
Build a setup you can repeat
A reliable USB monitor DAW setup is not about squeezing every possible function from one cable. It is about knowing which device Live uses for input, which it uses for output, and which settings remain stable from session to session.
Keep a small note with your working driver, sample rate, buffer, and selected I/O channels. Once playback and any needed recording pass a short test, stop rebuilding the chain. Set it right once; spend your energy finishing songs.
For further exploration, read your monitor system’s I/O documentation alongside Ableton’s current audio-device guidance, then test one change at a time in a short session before trusting it on a deadline.
Related Articles